In my previous post, I emphasized that Height is Everything in Mountain Stronghold. But to make verticality a core gameplay mechanic, the terrain can’t just be a visual backdrop—it needs to be digitally readable.
Today, I’ll dive into how I transform raw heightmaps into a structured, symbolic battlefield using three key architectural steps.
1. Defining the “Cliff”: Heightmap vs. Explicit Geometry
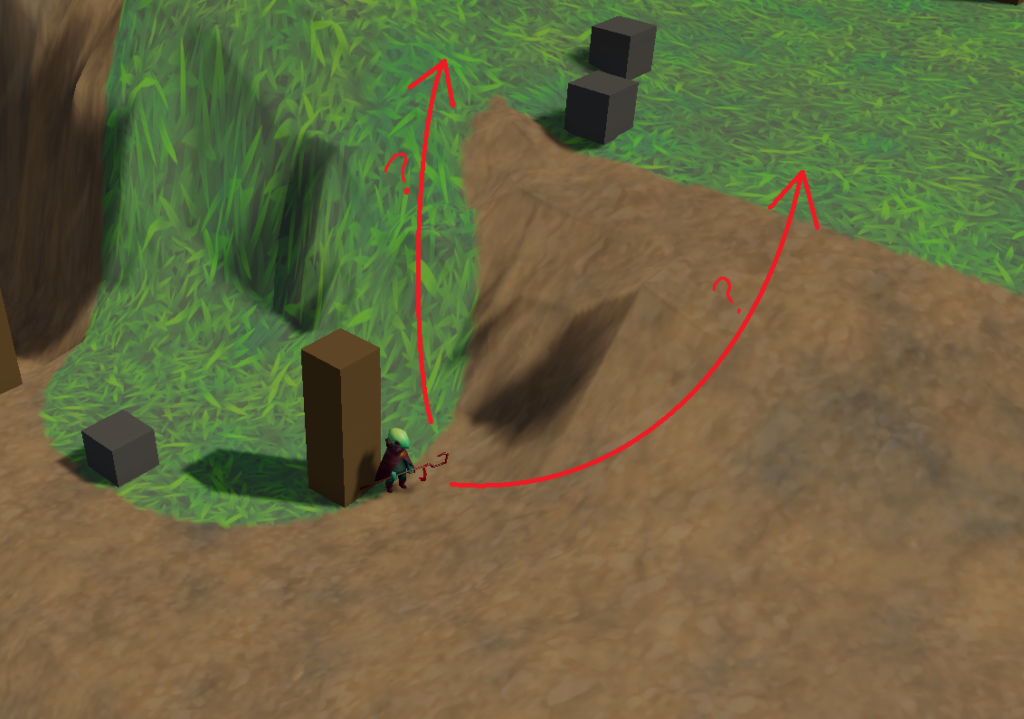
Standard heightmaps usually generate smooth, continuous slopes. While natural-looking, this creates a major problem for strategy games: Ambiguity. If a player can’t tell at a glance whether a slope is walkable or an impassable wall, it leads to frustration (See Image 1).
To solve this, I implemented a system that evaluates the connectivity between adjacent grid cells. I defined a strict threshold: any slope exceeding 30 degrees (a height difference of approx. 0.577 in my implementation) is considered “disconnected.”
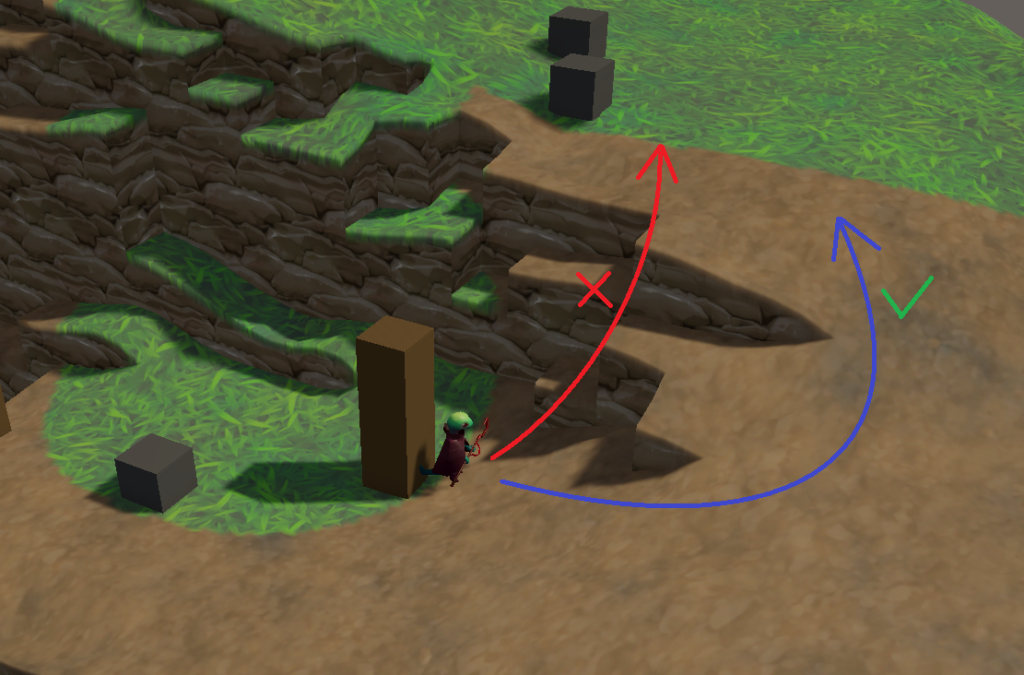
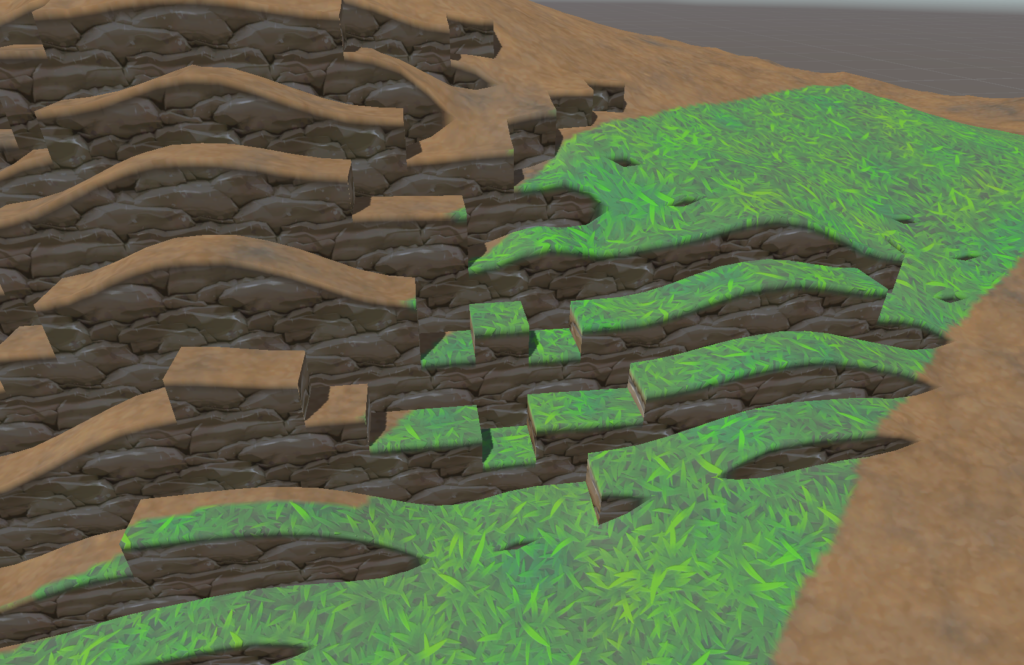
For these disconnected edges, the system explicitly generates vertical “Cliff” polygons (See Image 2). This turns the environment into a clear set of visual symbols, allowing players to instantly recognize tactical boundaries.
2. The Logic of 4-Quad Splitting
Instead of using a single 1x1m quad per grid cell, I divide each cell into four quads using 9 vertices.
0---1---2  (Corner - Edge - Corner)
| \ | \ |
3---4---5  (Edge   - Center - Edge)
| \ | \ |
6---7---8  (Corner - Edge - Corner)
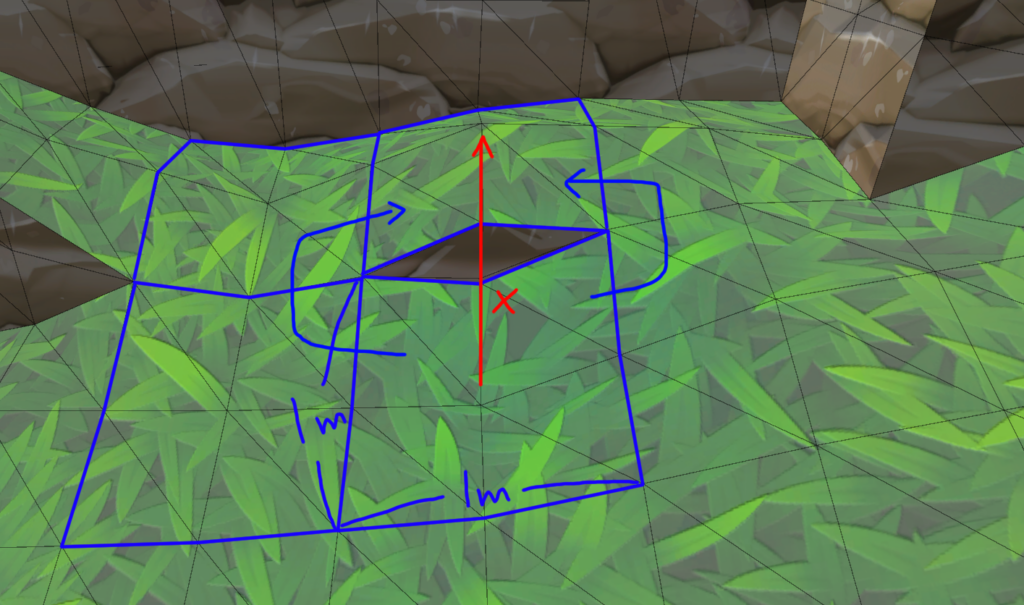
This isn’t just about adding detail. In a 3D environment, a single grid often has to handle conflicting topological data—for example, being a steep drop on one side while maintaining a gentle slope on another to allow for a bypass path. By splitting the grid, the center vertex can mediate these differences, ensuring the mesh remains watertight and accurately reflects the underlying navigation logic without distortion (See Image 3).
3. Visual Polish: Edge Smoothing & Normal Control
To make these “Symbolic Cliffs” look integrated and high-quality, I applied two specific geometric refinements:
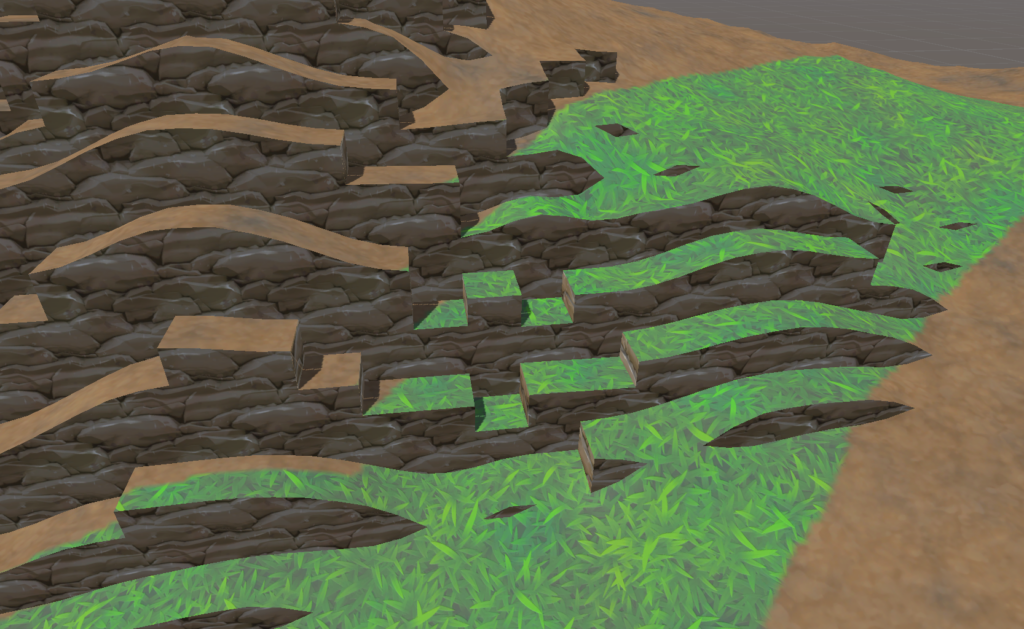
- Beveling with marginHeight: I added a small 0.25m margin at the top of each cliff to create a chamfered effect. This prevents the edges from looking like razor-sharp “developer art.”
- Normal Manipulation: I manually override the normals at the cliff’s edge to point straight up (Vector3.up). This ensures that the lighting catches the “lip” of the cliff, creating a distinct highlight that makes the verticality pop.
Why go through all this trouble? By aligning the visual geometry perfectly with the “Connectivity” data used by my navigation systems, I’ve eliminated the discrepancy between what the player sees and how the game engine behaves.
In a physics-heavy game where shoving enemies off mountains is a core mechanic, predictability is the key to satisfying chaos. If a player sees a sharp edge, they expect a unit to fall. If they see a smooth slope, they expect them to walk. This system ensures the “Rules of the World” are always intuitive and fair.
Next time, I’ll talk about how the enemies actually navigate this jagged terrain using FlowField navigation and BOID-based local avoidance.
Thanks for following the journey!